Transferring Files#
If you are transferring small files to your own home directory or a personal space you can copy from later, there are a number of methods you can choose from, including Cyberduck, scp, FileZilla, and KLC OnDemand. We provide instructions for using KLC OnDemand below.
Note
These types of file transfers have the potential to overwrite permissions in the KLC destination folder with the source permissions. In other words, they can corrupt permissions in a shared space. Please transfer these to a personal KLC space and then copy the contents to a shared KLC space later
Conversely, if you are transferring large files, or you need to ensure KLC destination folder permissions are preserved, we recommend using Globus file transfers. We provide instructions for using Globus Online from your desktop to KLC below.
KLC OnDemand File Explorer#
KLC OnDemand provides a browser-based file manager that requires no software installation. This is an apt option for quick transfers to and from KLC.
Log in to Quest OnDemand with your NetID.
Open the Files menu and select the directory you want (home directory, project directory, or scratch space).

Use the Upload button to send files from your computer, or select a file and click Download to bring it to your computer.
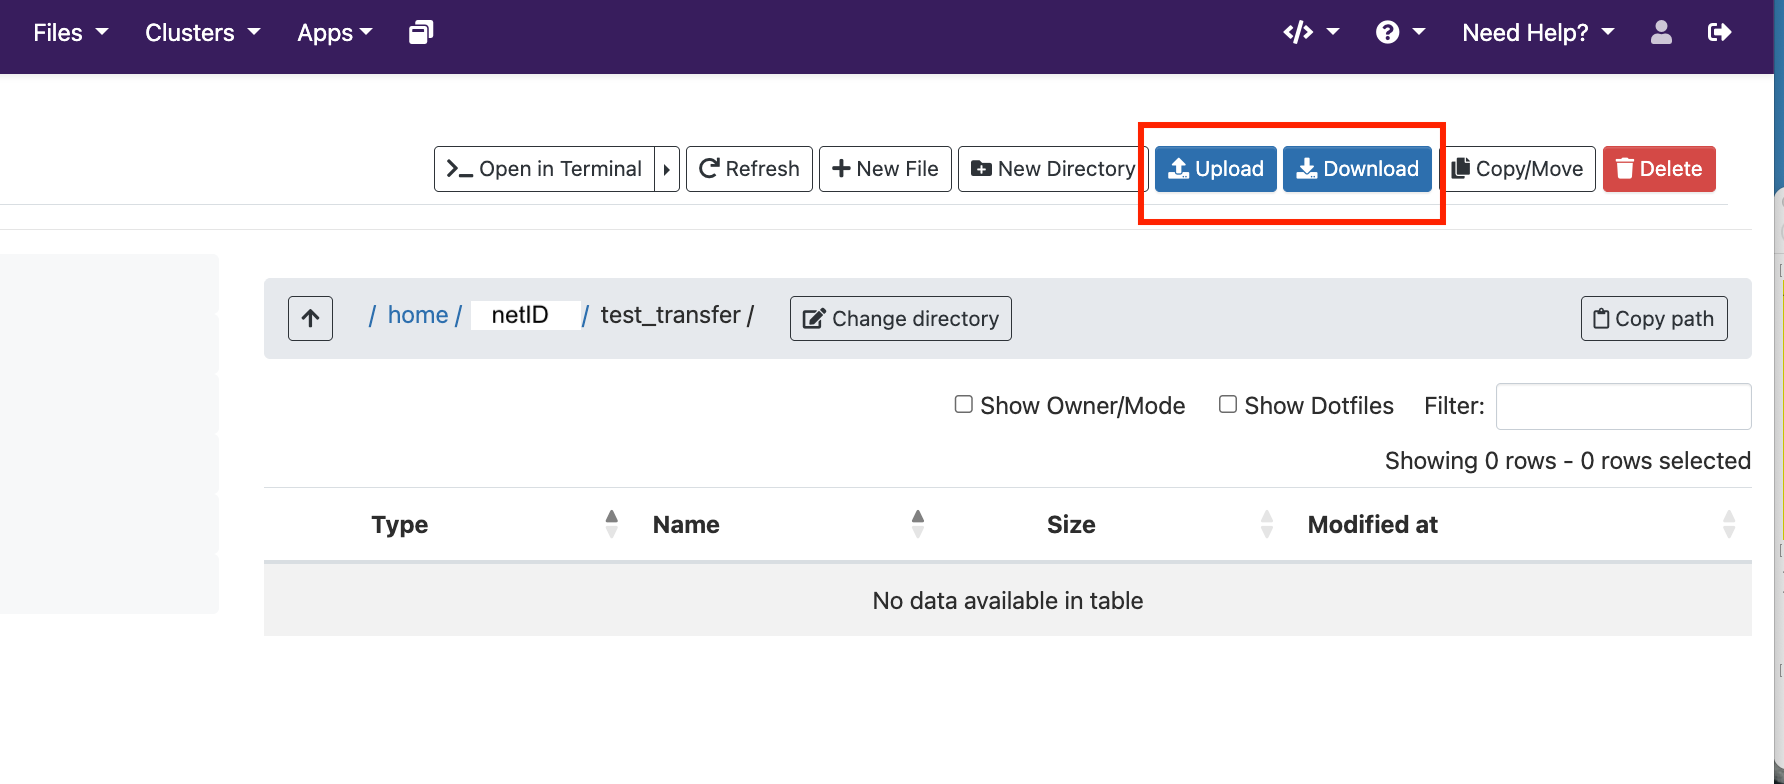
Finally, you can copy files uploaded using KLC OnDemand to another location. This ensures that your file transfer will not corrupt the permission settings in the destination folder.
cp -r /home/your_netID/test_folder /kellogg/proj/your_netID/shared_folder/
Note
The maximum file size for upload and download is approximately 10 GBs. For best results, use KLC OnDemand for files under 2 GBs. For larger or recurring transfers, use Globus below.
Globus#
Globus is the recommended tool for large or recurring transfers between KLC and external platforms (Northwestern OneDrive, Quest, collaborator institutions, and even your Desktop). It supports high-speed parallel transfers, automatic retries, and resumable transfers. There is no need to zip files or worry about timeouts.
NUIT provides detailed instructions for how to create your own Globus account and set another location (including your Desktop) as a Globus Endpoint Globus
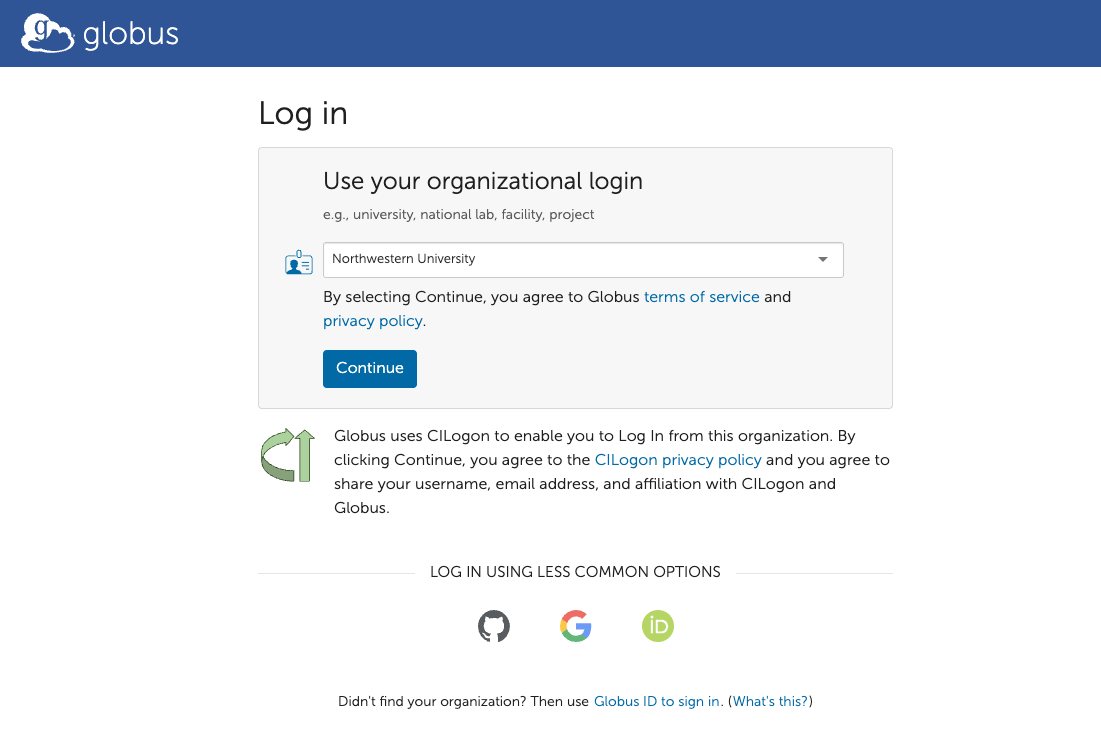
Once your account is created, go to Globus and log in with your Northwestern NetID.
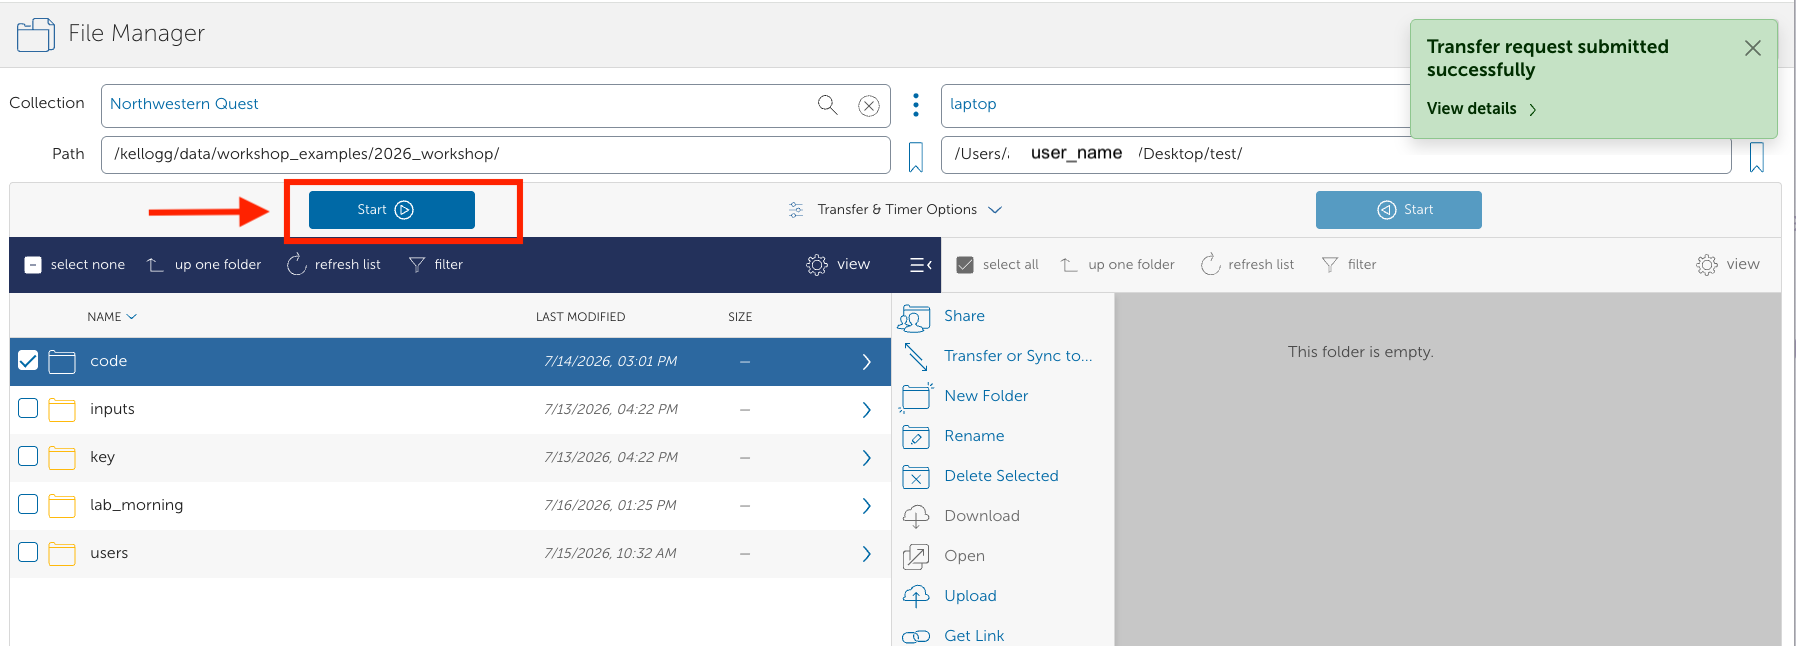
From the Dashboard, navigate to the “File Manager” in the left panel. Set one side of the transfer to a KLC endpoint by authenticating to the “Northwestern Quest” collection and your preferred directory in the “Path”. On the other side, select another Globus Collection (like OneDrive, another Quest allocation, a collaborator’s endpoint, or your Desktop).

To launch a transfer, select the files or folders to transfer and click Start. The details of the transfer including a confirmation that is complete and the destination files match the source files will be available in the “Activity” in the left panel.
Choosing the Right Method#
Scenario |
Recommended Tool |
|---|---|
Quick transfer, browser only, no install |
KLC OnDemand File Explorer |
Large datasets or recurring sync |
Globus |